Advice for cycling from London to Paris

Why preparation for a charity cycle ride is key
London to Paris is a great multi-day ride for cyclists of all abilities and can be made all the better with the right preparation. Getting your body, bike and brain ready for several consecutive days riding will make the experience all the more enjoyable and hopefully avoid any disappointment at not being able to complete the challenge due to lack of fitness.
The fitter you can arrive at the start the better, so once you have your event date start training as soon as you can. The more effort you can put in before the event the more you will get out of it.
What to expect
Knowing what you’re likely to encounter both physically and mentally during a multi-day ride will stand you in good stead for the event and also help you prepare for it. First thing is find out is how many days you have to ride and how far you are riding each day.
There are several different routes from London to Paris, each with varying distances and terrain over each day so make sure you know what you will be doing. Get a map of the route and also a terrain profile which shows how much climbing there is each day.
An average itinerary for a three-day London to Paris ride looks like the following:
Day one – London to the coast, approx 90 miles with several climbs. Day one is usually the hardest so be prepared for some tough climbs on the way to the coast.
Most tours get the ferry at the end of day one to get the crossing out of the way and a more pleasant start in France on day two. This does make for a long day so be prepared for a few hours of waiting about after the finish until you get to your hotel in France.
Day two – French coast inland to possibly Amiens or surrounding area, approx 90 miles with several hills but less climbing than day one. You’ll be feeling the efforts of day one, but being in a new country with unfamiliar roads and different scenery makes it much easier mentally.
Day three – Amiens or similar place to Paris, approx 60 miles with only a few climbs. This is such a good day as it’s the final leg and despite two days’ efforts you know the finish is near and mileage is less than the previous days which you have got through to reach this point.
The outskirts of Paris are surprisingly hilly, but when you see the Eiffel Tower in the distance you suddenly find a new source of energy and the previous days’ efforts seem to fade away.
With this basic information; number of days, distance and climbing each day you can plan your training accordingly.
Training plan (including tapering before the event)
As with any fitness plan, if you are new to exercise or increasing your training considerably we’d recommend you see your GP before you start.
While we’d all love to give up work to concentrate on training, we know there’s only so much time we can spare from busy lives. Once you’ve signed up to an event, work out how many weeks you have to prepare and make a realistic training plan that you can stick to according to the time you have available each week to train.
The main thing is to try to replicate the demands which will be placed on your body during the event. The end result is to build up to some long rides with 4-5 hours' duration and also to get used to riding for two or three consecutive days.
Start by riding several times per week and build up the time spent in the saddle and then distance. Do some back-to-back rides when you can and then increase the duration and distance of these rides to get your body used to doing long rides day after day. Try to get some hills in as well as you will no doubt encounter some climbs no matter which route you follow to Paris.
The 10-week training plan below is designed for a 100km sportive but is a good guide to base a plan on and will get you to the start in good shape. We recommend you try to do an easy ride (even just 30 minutes) on the third day after back-to-back days later on in the programme and move a rest day. Don’t be afraid to ask a more experienced cyclist for help with any plans.
Week 1
Monday: Day off.
Tuesday: 30 mins, easy effort. You should be able to hold a conversation.
Wednesday: Day off.
Thursday: 30 mins, easy effort. You should be able to hold a conversation.
Friday: Day off.
Saturday: 10-15 miles on flat roads (if possible), easy effort. You should be able to hold a conversation.
Sunday: Day off.
Week 2
Monday: Day off.
Tuesday: 45 mins, easy effort.
Wednesday: Day off.
Thursday: 30 mins, easy effort.
Friday: Day off.
Saturday: 15-20 miles on flat roads (if possible), easy effort.
Sunday: Day off.
Week 3
Monday: Day off.
Tuesday: 45 mins, easy effort.
Wednesday: Day off.
Thursday: 45 mins, easy effort.
Friday: Day off.
Saturday: 20-25 miles on flat roads (if possible), easy effort.
Sunday: 60 mins, made up of 20 mins easy warm up, then 20 mins steady (you should be able to talk in short sentences), then 20 mins easy cool down.
Week 4 (easy week)
Monday: Day off.
Tuesday: 60 mins, easy effort.
Wednesday: Day off.
Thursday: 45 mins, easy effort.
Friday: Day off.
Saturday: 30-35 miles on flat roads (if possible), easy effort.
Sunday: 60 mins, made up of 20 mins easy warm up, then 20 mins steady (you should be able to talk in short sentences), then 20 mins easy cool down.
Week 5
Monday: Day off.
Tuesday: 60 mins, easy effort. But do 3 x 5 mins at a harder pace spaced out within the 60-min ride.
Wednesday: Day off.
Thursday: 60 mins, easy effort.
Friday: Day off.
Saturday: 35-40 miles on flat roads (if possible), easy effort.
Sunday: 65 mins, 20 min easy warm up, then 25 min steady (you should be able to talk in short sentences), then 20 min easy cool down.
Week 6
Monday: Day off.
Tuesday: 60 mins, easy effort. Do 4 x 5 mins at a harder pace within the 60-min ride.
Wednesday: Day off.
Thursday: 75 mins, easy effort.
Friday: Day off.
Saturday: 40-45 miles on flat roads (if possible), easy effort.
Sunday: 65 mins: 20 mins easy warm up, 25 mins steady (you should be able to talk in short sentences), 20 mins easy cool down.
Week 7
Monday: Day off.
Tuesday: 60 mins, easy effort. Do 2 x 10 mins at a harder pace within the 60-min ride.
Wednesday: Day off.
Thursday: 75 mins, easy effort.
Friday: Day off.
Saturday: 45-50 miles on flat roads (if possible), easy effort.
Sunday: 70 mins: 20 mins easy warm up, then 30 mins steady (you should be able to talk in short sentences), followed by 20 mins easy cool down.
Week 8 (easy week)
Monday: Day off.
Tuesday: 1 hour, easy effort. Do 2 x 10 mins at a harder pace within the 60-min ride.
Wednesday: Day off.
Thursday: 90 mins, easy effort.
Friday: Day off.
Saturday: 50-55 miles on flat roads (if possible), easy effort.
Sunday: 70 mins. Start with 20 mins of easy warm up, then 30 min steady (you should be able to talk in short sentences), followed by 20 min easy cool down.
Week 9
Monday: Day off.
Tuesday: 60 mins, easy effort. Do 2 x10 mins at a harder pace within the ride.
Wednesday: Day off.
Thursday: 90 mins, easy effort.
Friday: Day off.
Saturday: 55-60 miles, easy effort.
Sunday: Day off.
Week 10 (taper week)
Monday: Day off.
Tuesday: 60 mins, easy effort.
Wednesday: Day off.
Thursday: Day off.
Friday: Leave London ride day one.
Saturday: Ride day two.
Sunday: Arrive in Paris at end of ride day three.
Take a spare tube, pump, tyre levers and multi-tool with you on rides and don’t forget to eat and drink on rides no matter the distance.
Rest is also an important part of the training cycle so if you have had a heavy couple of days or if you are feeling run down, don’t be afraid to listen to your body and take it easy if needed. The week leading up to the event should be a very easy week with just one ride a couple of days before the start to keep the legs in shape.
There’s also information on training for your first event and an alternative plan or 100-mile training plan.
What to wear
Padded cycling shorts without underwear is a must when spending hours in the saddle day after day. If you are conscious of wearing Lycra then go for touring shorts or even cross-country mountain bike shorts as they look like board shorts – just make sure they have padding in them and aren’t too baggy.
A good base layer and cycling jersey with pockets in the rear will be handy. Padded gloves are recommended for hours in the saddle. A gilet is a very versatile piece of clothing and can be easily stowed in jersey pockets if not needed without being a hindrance as will a lightweight rain jacket.
Sunglasses with interchangeable lenses are a good idea and not very expensive. Arm warmers are highly recommended as they should save you taking a long-sleeved top unless you are riding in the colder months, in which case you’ll definitely be wearing longs!
You will become fixated with regional weather reports leading up to the event so make sure you bring the correct kit. Weather can be changeable no matter what time of year you are undertaking the ride.
We’ve been on rides midsummer and the weather has changed to rain and the temperature dropped 10 degrees very quickly leaving riders sheltering in a café. This ended up quite pleasant, but if you are stuck out in the open with no shelter it’s a very different matter.
Checking your bike
We cannot overstate how important it is to arrive at the start with your bike in good working order. Not only could you delay your own start but also potentially the group as you try to remedy any problems.
There’s enough going on at the start for everyone involved that any existing mechanicals will only add to the pressure. A badly prepared bike could also increase the likelihood of not being able to finish. Mechanicals do happen and the support crew will do everything possible to fix them, but turning up at the start with existing issues isn’t a good look.
Clean your bike and check for any problems. Check the tyres, if there are any cuts or gashes replace them, and if tubes are losing air discard them and fit new ones. Same with cables: any frayed or sticky cables should be replaced. If your wheels are buckled or you have loose spokes get them fixed. These are the most common faults that can be easily rectified beforehand.
Chain, cassette and front chainrings should be inspected and if worn should also be replaced. Similarly if anything is rubbing (brakes) or feels rough or sticky (bottom bracket or headset) get it checked out. If you’re not confident in your own mechanical ability don’t be afraid to ask for help or take your bike to a shop for a tune up.
Get your bike serviced a week or two before the event and make sure you get at least one good ride on it to make sure everything has settled.
Bring a few spare inner tubes, multi-tool, tyre levers, puncture repair kit and mini-pump with you. All these items (bar the pump) can easily fit in a saddle bag to keep your jersey pockets free. Even if you’re not confident in how to use tools or replace tubes others will be keener to help if you have them with you.
As the ferry trip is usually done at the end of day one this can make for a long day and you may need lights to ride from the ferry to the hotel. Your itinerary will tell you if lights are needed so please heed this instruction.
For more in-depth information on what to check on your bike, see our guide to simple cycle safety and service checks.
What to pack
The absolute minimum in cycling clothing you should have is two pairs of padded cycling shorts. Three is best so you have a clean pair each day, otherwise two is a must and wash day one’s as soon as you get to the hotel that night. This minor task does become a drain, though, so again we’d recommend three pairs.
Same goes for all cycling kit: if you can take three of everything. This includes base layer, jersey and socks; it will cut down on things to think about once you finish.
A rain jacket is a must whatever the weather forecast says. A gilet, arm warmers, leg warmers, cycling padded fingerless gloves, as well as a thin pair of long finger gloves are handy. A long-sleeved top and a cap are also good to have.
Cycling shoes should be broken in before the event, especially if you have new cleats as stopping often to adjust delays everyone.
Here’s what we recommend (remember that there will be a van carrying your kit between hotels so weight isn’t such an issue):
- Cycling shorts x 3
- Base layer x 3
- Socks x 3 pairs
- Short-sleeved jersey x 2 minimum
- Rain cape
- Cap
- Gilet
- Arm warmers
- Leg warmers
- Knee warmers
- Gloves – long and short finger
- Long-sleeved jersey
- Comfortable clothing for off the bike, as there’s nothing better after a long day in the saddle than getting into comfy non-restrictive clothes.
- Chamois cream should be applied directly to the padding in the cycling shorts with an antiseptic cream applied to the body if needed. These barrier creams really are effective over many hours and many days and help to keep that area clean and free from infections. Antiseptic cream is especially handy for during and after the ride and certainly helps sooth that area and aid recovery!
- Sunblock is a necessity in non-winter months and a first aid kit is always handy to have.
- Personal accident insurance is worth taking out in case any incidents do occur. Cycling UK membership includes third-party insurance as one of its many benefits.
What to eat
Most London to Paris events have feed stops planned along the route each day, but don’t just rely on these. Start each day with some food in your pockets, as waiting until the feed may mean you riding for several hours without any food.
Replenish any food from your pockets at the feed stop as well as eating there, as you’ll appreciate some snacks towards the end of each day’s ride. Keep in mind that the feed stops might have food which doesn’t agree with you, so take stuff you like or let support crew know of any allergies or dietary needs beforehand.
Try different drinks and foods in training rides before your big event to see what agrees with your body and makes you feel good. One of the all-time great mistakes is to try something new and find it makes you feel ill during a long ride.
One good marker along the way is to check you have drunk a bottle of liquid each hour. We recommend drinking every 15 minutes during the ride.
Fuelling is about staying ahead of the game – don’t wait until you feel hungry or thirsty as by then it’s too late and it can be very difficult to restore your equilibrium.
Lastly, bring some food for afterwards and start the refuelling process as soon as you finish. Protein or milky drinks are great to take after the event as they repair damaged muscle fibres.
For more information on how to fuel your cycle rides, see our guide to what to eat and drink.
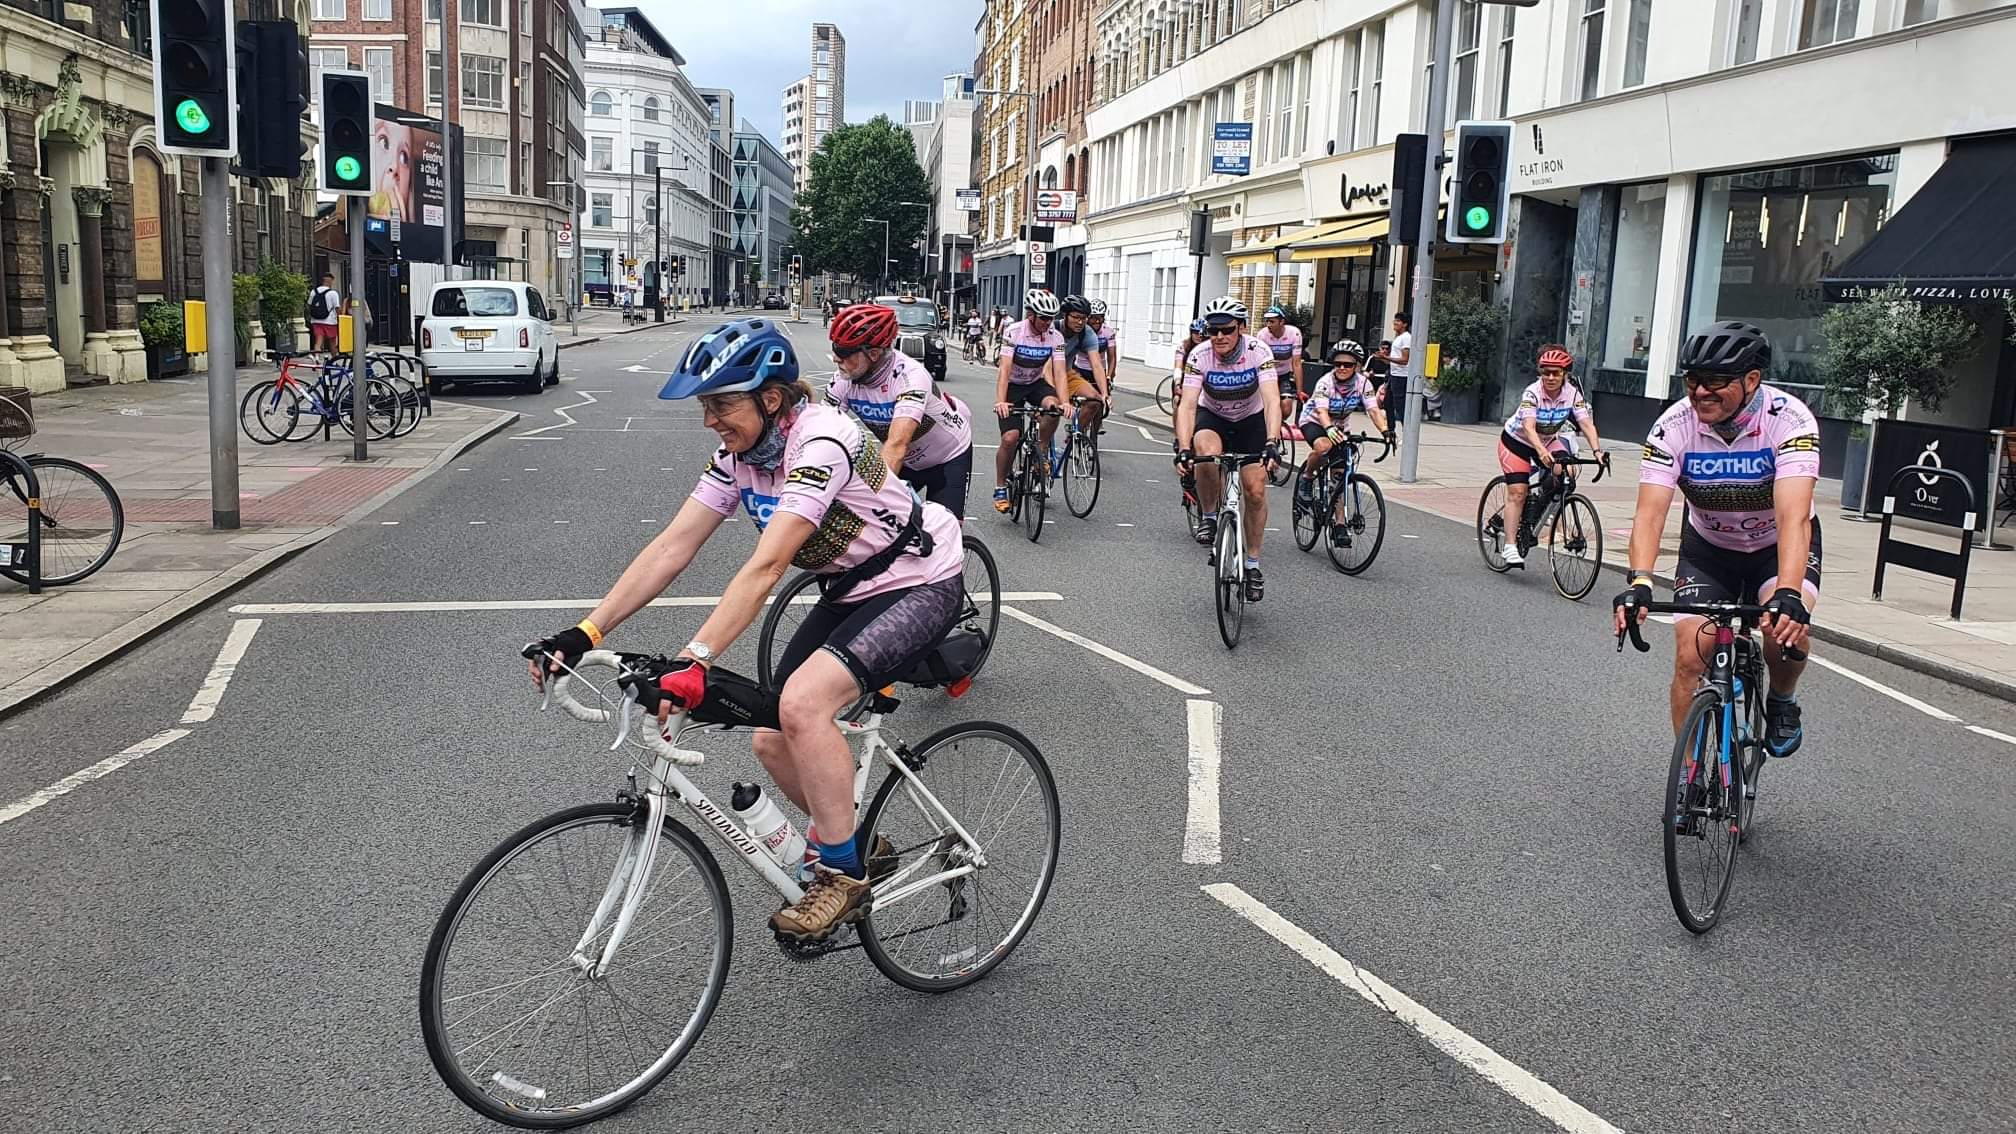
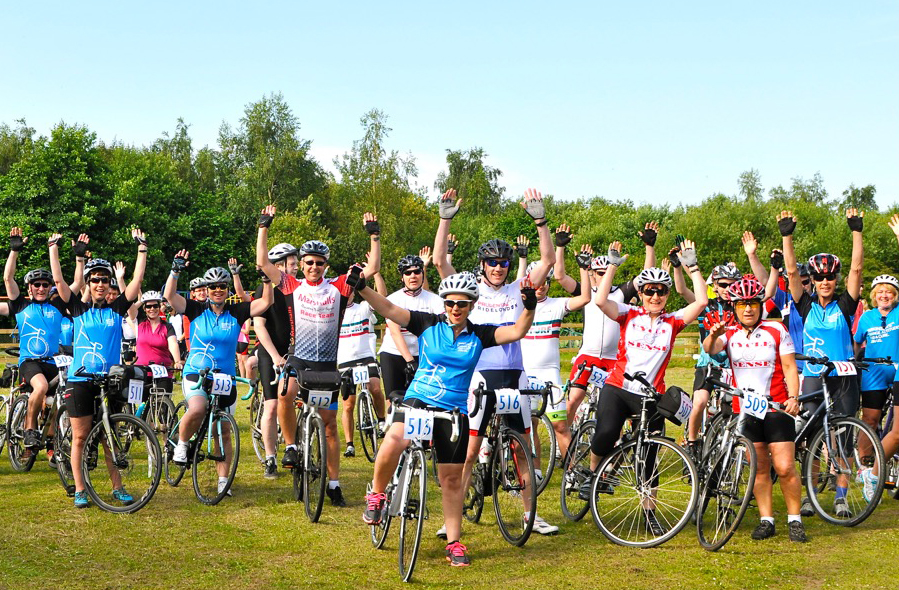
Working as a team of riders
Riding in a group makes big a difference to riding on your own, especially over many days. The camaraderie really does grow as the days go on and the support and encouragement can really make the difference towards the end.
Group riding is easier physically easier than riding on your own as sheltering behind other riders can save energy as they are breaking the wind for you. It also makes it easier psychologically as there are others there to share experiences with, more so when you are finding it hard going.
If you are feeling strong then help others rather than just riding off faster. Look out for others, especially anyone who appears to be struggling as a little encouragement can go a long way. If you are finding it difficult, then don’t be afraid to ask for help – if others don’t know they can’t be of assistance! Also don’t be afraid of telling the support crew of any concerns you may have as they will endeavour to help.
Riding as a group means you have to look out for each other. If you are in a line of people you may not see hazards or hear approaching vehicles, so make sure you call them out when you see them.
Warnings about hazards such as potholes, drains, street furniture or debris on the road, parked cars or vehicles approaching the group from front or rear will be appreciated by riders in the middle of the pack.
It’s advisable to try riding in a group before the event and this can be easily done. Sign up for a sportive or smaller charity ride as there’ll be plenty of people riding. Find a training partner as knowing someone is counting on you to be there is a big motivator to go training especially in inclement weather, or join a club or organised ride.
Remember that you are riding on open roads so the normal rules of the road apply. Do not ride more than two abreast and keep to the relevant side of the road, the first morning in France always catches someone out!
For more information on group riding and to find a Cycling UK group or ride read our guide to taking part in a group ride.
How to finish well
Getting to the finish is a real combination of everything we’ve talked about. Getting the training in beforehand is crucial, but making sure your bike is in good condition, you’re eating and drinking properly during and after each day’s ride, you’re wearing the correct clothing for the conditions and working as a team will all help you to complete the challenge.
Take time to look around when you’re riding to appreciate the surroundings and don’t focus too much on the distance and weather. Everyone works together to get everyone to the finish and when you do it’s a great feeling of satisfaction and elation.
No matter how tired you feel, just think of the reasons why you are doing the ride and how much money you will raise. You’ve put a lot of effort in to just get to the start line, so a few days of effort is easy to overcome.
And remember, you’ve volunteered for this so try to not get too stressed and enjoy the experience!
Popular content