How to get fewer flat tyres on your bike

Never mind reduced rolling resistance or improved ride comfort, for many cyclists the real attraction of tubeless tyre technology is that when you get a puncture, you generally don’t get a puncture. At no time of year is this more welcome than winter, when roadside maintenance is a miserable business – as a flat tyre on a recent wet ride forcibly reminded me.
For the last five years, I’ve almost exclusively ridden tubeless tyres. But not that day. While getting my hands filthy replacing the tube and removing the offending flint from the tyre, I had a thought, which I’ll call ‘faux tubeless’.
Getting stuck in
A tubeless tyre is not proof against punctures but resists subsequent air loss either by retaining the offending sharp object, which then plugs the hole it made, or, should the object fall out, by clogging up the hole with sealant. This doesn’t happen with an innertube, which will lose air even if the sharp thing is stuck fast in the tyre.
Simply putting tubeless sealant in an innertube won’t fix this. The sealant will have a hard time sealing a hole as the tube wall isn’t thick enough to let a plug of sealant granules build up. The usual result is simply a loss of sealant to the gap between tyre and tube.

So the question I asked myself was: why not glue the tube to the inside of the tyre and then add some sealant? This would make the tube an integral part of the tyre.
A thorn stuck in the tyre would also be stuck in the tube, while the sealant would be as effective as in a tubeless tyre since it could not escape into the tyre/tube space. Furthermore, a tyre plug would work as intended, since it would plug both tyre and tube simultaneously.
Once home I put the idea into practice. My first efforts resulted in the tube sticking to the tyre unevenly, distorting the tyre on inflation. But after several attempts I found a process that works well and which is described below.
The results, trialled in several pairs of tyres over more than 1,000 miles in rubbish conditions, have exceeded expectations. An offending thorn could not be prised from one tyre, which has lost no pressure in four weeks.
There’s no discernible loss of performance or ride quality compared to the same tyre and tube run conventionally. And, since the tube shrinks back into the tyre when deflated, a faux tubeless tyre can be removed easily from the rim – without sealant loss, of course.
Why bother?
Why go to such lengths when a tubeless system proper does the job without the bother?
Wider tyre and rim availability
Faux tubeless can be used with any tyre and rim combo. I was riding tubed because the tyre concerned – the excellent Grand Bois Hetre – is not available tubeless.

When you ride with tubes you also don’t need to worry about the limited availability of tubeless-ready, rim brake-compatible 650B/27.5in rims; the same goes for 26in (559mm) tyres and rims and, to a lesser extent, 700C.
Less mess, uncertainty and difficulty
Tubeless tyres come with their own problems. Even a straightforward installation can result in spilled sealant, and removal or refitting means going though the whole process again.
Once installed, a tubeless tyre may not stay up for as long as hoped – sealant slowly dries out, resulting in air leakage, while a softening tubeless tyre may lose enough air to completely deflate overnight.
Most tubeless tyres are a very tight fit on the rim to provide an effective seal, which makes fitting and removal more difficult, and often demands a high-flow pump or gas canister to seat the tyre.
Convenience
Once ‘made’, a faux tubeless tyre can be put on a rim and inflated easily with a regular hand pump. It will retain air as well as a standard tubed tyre, and can be removed or swapped between wheels as often as required without mess or loss of sealant.
There are other minor benefits: the system will hold a higher pressure than tubeless as the innertube helps lock the tyre bead to the rim hook; it won’t burp air if it hits a bump; and only half the usual amount of sealant is needed because it doesn’t need to address tyre sidewall porosity or to complete the seal between tyre and rim.
How to do it
You’ll need a detachable (not tubular) tyre, an innertube with a removable valve core, tubular tyre cement and tubeless tyre sealant. Ideally the tube should need to stretch slightly to fill the tyre; don’t use one that is too wide as it will bunch up inside the tyre.

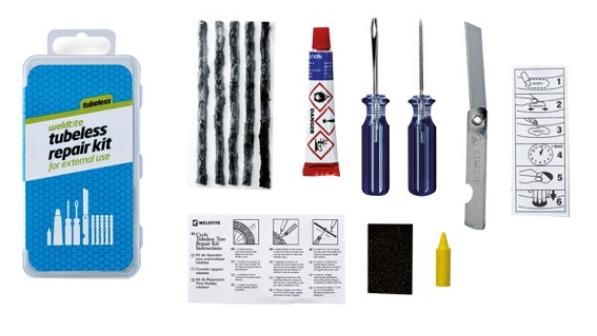
I used Continental tubular cement, which can readily be applied in a thin, even layer. You may also need one of the various tubeless repair kits in case you get a puncture the sealant won’t fix.
Instructions
- Wash the tyre to remove any residual mould-release agent and the tube to get rid of any talc, both of which will impair adhesion. Car shampoo and a rinse will do the job. Dry both the tyre and tube.
- Ideally, invert the tyre so the inside surface is accessible for gluing. The job is easier if you have a suitable support for the tyre.
- Apply a thin coating of tubular cement to the inside surface of the tyre over an area corresponding to the tread cap on the outside. (The unglued section of sidewall will allow the corresponding part of the tube to be moved aside for easy removal and installation of the tyre/tube assembly.) Allow the cement to dry until slightly tacky. Don’t glue the tube.
- Revert the tyre to its correct, tread-outward shape. Lightly inflate the tube so it holds its shape but doesn’t expand and place the tube inside the tyre pocket. It should rest lightly in the tyre. Do not try to make it stick firmly yet.
- Place the wheel inside the tyre and tube with the valve in the rim hole, then fit each bead inside the rim in turn as if fitting a regular tyre and tube. The tube should now be sitting inside the tyre but without pressing against the glued inner tyre surface.
- Check the tyre is evenly spaced around the rim and inflate the tube to about 20psi. The aim is to ensure the tube expands against the inside of the tyre without a twist or kink, which can distort the tyre. Check the tyre beads are seated correctly and that the tyre runs true, then inflate fully. This will stick the tube firmly to the inside of the tyre.
- Deflate the tyre/tube system, remove the valve core and add sealant. You’ll need about half the usual amount as it does not need to seal the tyre/rim interface or any tyre sidewall porosities. Inflate to your preferred pressure. Then ride.
Some caveats
I won’t be gluing tubes inside the tubeless-ready tyres on my tubeless rimmed wheels, mainly because there’s no point adding the weight of a tube to a system that, for the most part, works better without it.

Whether stuck to the tyre carcass or not, a tube adds a layer of rubber that cannot help but add to tyre stiffness, increasing rolling resistance and reducing ride comfort. As noted, adding a tube to an all-tubeless system can make tyre fitting a real pain.
A faux tubeless innertube is as vulnerable to a pinch flat as a regular one, making the idea of little use to anyone running low inflation pressures off road.
What about a cut beyond the repair capacity of a plug? The faux tubeless innertube can be peeled from the tyre without much trouble, the tyre booted and a spare tube used as usual. (As with tubeless, the tyre must be inspected for embedded thorns showing on the inside, which will puncture a new tube.)
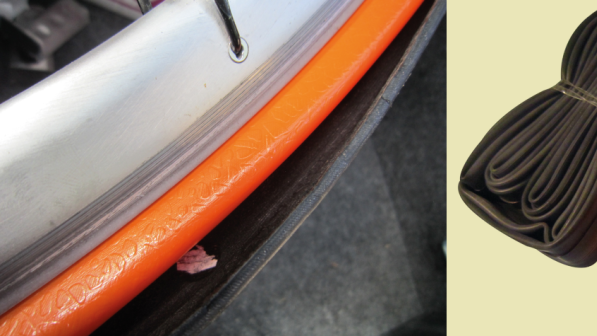
I will be gluing innertubes inside tubeless-ready tyres for use on non-tubeless rims (I’ve already done it with some Rene Herse tyres) and inside conventional clincher tyres for use on tubeless and conventional rims (such as the Grand Bois Hetre pictured).
Faux tubeless is something anyone can do at home. It provides tubeless levels of anti-flat performance without the need for the tyre and rim technology.


