A beginners’ guide to … stretching before a bike ride

Be honest: do you warm up before getting on your bike? I know from personal experience that it’s all too easy to skip stretching to save a bit of time. You can warm up on the bike, right? Wrong.
Missing out this important part of your workout could have a detrimental effect on your performance as well as your comfort and enjoyment. It could even potentially lead to injury. This is especially true of longer club or solo rides, but it’s also not great for your body to cycle straight home after sitting at a desk all day.
Just 5 to 10 minutes spent warming up will prepare you physically and mentally for the ride ahead. However, keep in mind that this isn’t medical advice and you should consult your doctor before embarking on a new stretching routine.
Why pre-ride stretching matters
Cycling is a very repetitive activity which only uses certain muscles. This means those muscles can get overused, over time tightening and shortening and potentially pulling your body out of alignment and even possibly leading to injury.
Jumping on your bike without stretching first will also limit your ability to ride. The muscles won’t be able to move through their full range, leading to greater effort, discomfort and reduced performance.
By skipping the stretching, you’re putting extra and unnecessary strain on your body. This means you’re more likely to experience those unwanted aches and pains after your ride. Stretching helps prepare your body for activity so you’re less likely to suffer throughout the day.
A short warm-up will help to lengthen and loosen the muscles. This ensures they’ll work much more efficiently while you’re cycling and help prevent injury. They’ll also be able to move smoothly through their full range of motion, leading a much more comfortable, effortless ride for you. Well, maybe not effortless!
How your warm-up helps
A pre-ride stretching routine prepares your body for cycling, activating the muscles you’re about to use. It allows your heartrate to increase gradually, rather than going all in from the start which helps protect your heart.
Getting the heart pumping delivers more blood – and therefore more oxygen – to the muscles. This gives them essential nutrients for the work ahead and lubricates the joints – much like warming up a cold engine oils the moving parts.
This increases mobility and range of motion, meaning you can cycle more comfortably, leading to better performance on the bike and fewer aches and pains off it. It also means you’re less likely to strain the muscles, lowering the risk of other injuries and helping you recover more quickly.
A warm-up also helps you mentally prepare for the ride ahead. This might not be so important for a short commute, but for longer rides and especially sportives and other long-distance events being in the right headspace can make a real difference to your performance and how you feel during the ride.
Types of stretching: dynamic vs static
The type of stretching you do before a ride matters. Dynamic stretches are what you want for your pre-ride warm-up. They gently take the muscle through its range of motion, warming it up and getting it ready for the activity to come. This gentle movement is what gradually gets the heart beating faster, increasing blood flow.
Performing static stretches before a ride, on the other hand, might hinder your performance. Holding the muscle still in a static stretch relaxes it into a lengthened state, getting it ready for rest, which is the opposite of what you want just before getting on your bike. Static stretching should be saved for after your ride or rest days – certain types of yoga can be very good for this.
You can read more about static and dynamic stretches in our guide to post-ride stretching.
How to do it
It’s a good idea to get your pre-ride stretching right. The last thing you want is to strain a muscle doing the thing you’re doing to protect yourself against straining a muscle. It’s best to not go into your stretches cold – start with some gentle walking, marching on the spot or jumping jacks.
Then start slowly and gradually build up speed with all movements, allowing your muscles to gently warm up and get used to the motion.
Perform each exercise with control, moving the muscle through its full range of motion but without forcing anything. You should feel a stretch but never pain. If it hurts, back off immediately.
The exercises should mimic the movements you’ll be performing during your bike ride, warming up the muscles that will be most used. With cycling, this means concentrating on the lower body: hip flexors, quadriceps, hamstrings, glutes, knees and ankles. But don’t neglect your shoulders and core.
It doesn't have to take a huge amount of time. Just 5-10 minutes of pre-ride stretching can make all the difference. You don’t need a lot of room either – most stretches can be done on the spot.
Taking it a step further
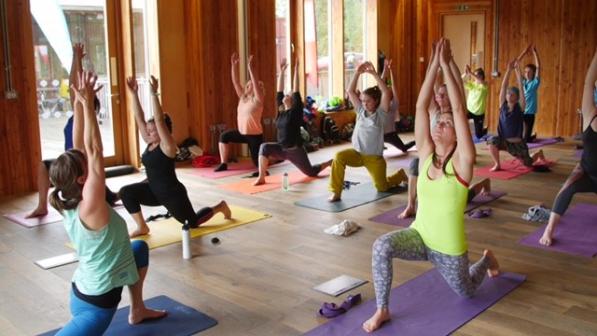
Yoga is an excellent complement to cycling. It helps balance the body, lengthening and loosening muscles that get tight and short through the repetitive motion of cycling. Using your yoga practice as cross training will make you feel good and improve your performance on the bike.
Alice McNeil of Alice McNeil Integrative Health, a yoga instructor and keen cyclist, says: “Yoga is one of the best ways we can achieve balance on the bike, prevent injury and recover more quickly.” She describes it as the ideal companion to cycling, and while she recommends post-ride yoga or using it as part of a general cycling fit strategy, she also says that a pre-ride session can offer benefits.
“Yoga brings space to the areas that get tight and strength to the areas that can get a little weaker,” she says. “Not only that, it helps to foster resilience to more challenging aspects of the ride. It can even help us to breathe more efficiently!
“A regular yoga practice helps you to ride for longer, with more comfort and fewer injuries. Importantly, it helps you to recover more quickly and improves body and mind awareness. You might even find that it gives you even more joy.
“Yoga, whether before, after, during or even the next day can offer a whole range of physical and psychological benefits to the rider.”
Alice recorded a yoga session for us that’s ideal for getting your body prepared for bike ride:
Your pre-ride stretching session
The following warm-up should only take about 10 minutes. It aims to activate all the muscles you’ll need for your ride. Start with a couple of minutes of marching on the spot or jumping jacks.
1. Leg swings
What it does
This exercise improves hip mobility, flexibility and strength by activating the hip flexors, hamstrings and glutes – the main muscles used in cycling.
How to do it
Stand sideways on to a wall or other flat surface, with your right side close to the wall. Stabilise yourself by placing your right hand on the wall. Swing your right leg backwards and forwards in a controlled motion. Repeat 10-15 times then turn around do the same with the left leg.
2. High knees
What it does
High knees help to improve lower-body endurance, strength and coordination. They activate your quads, calves, glutes and hamstrings.
How to do it
Stand up straight with feet shoulder distance apart. Lift one knee up towards your chest, as far as it will comfortably go. Immediately place it back on the floor and then repeat with the other leg – like you’re marching on the spot. Start slowly and gradually build up speed. Repeat 15-20 times per leg.
3. Calf raises
What it does
These build strength in the calves, also helping to improve ankle stability. They activate the calf muscles which are essential to pedalling – especially uphill!
How to do it
Stand with feet about shoulder distance apart then rise up onto your toes then lower back down. Perform 15-20 repetitions.
4. Reverse lunge with spinal twist
What is does
Reverse lunges primarily target the glutes, hamstrings and quadriceps, building lower-body strength and flexibility; they also engage the core. They’re easier on the knees than forward lunges. The added spinal twist improves flexibility in the spine, hips and shoulders.
How to do it
Stand with feel about hip-width distance apart. Take a large step backwards with your right leg and lower the knee towards to the floor – you don’t have to touch it; you’ll soon find your strength and flexibility improve enough to mean you can.
While in the lunge position, twist your upper torso to the right, concentrating on twisting from the ribcage rather than the waist. Rotate back to centre and return to the standing position. Repeat on the left side. Perform 10 repetitions on each side.
5. Arm circles
What it does
The exercise will help strengthen the muscles in your arms and shoulders: biceps, triceps and deltoids. It will improve shoulder flexibility. This will improve your posture on the bike.
How to do it
Stand with your feet shoulder distance apart and arms extended to the sides. Start making small circles with both arms in a backwards direction. Gradually make the circles bigger over 30 seconds. Repeat in a forwards direction.
6. Plank to downward dog
What it does
This yoga move warms up your calves and hamstrings, while strengthening the core and shoulders.
How to do it
Start in a high plank position with feet about hip width apart, shoulders over wrists and fingers spread. Push your hips up and back until you’re in a downward facing dog position, with your head between your arms and your tailbone pointing up towards the ceiling.
Your heels don’t have to touch the floor, and you can bend your knees to make the pose easier. Roll forward to return to a plank position. Repeat 8-10 times. For an added calf stretch, while in downward dog, lift your left heel while pressing the right towards the floor, then swap sides.
If you have time you can repeat the whole sequence. You’re now ready to ride. And if you’re looking for advice on how to recovery after a ride, read our guide to post-cycle stretching.


