Tips for cycling in the wind, wet and leaves

Isobars are tightening and the autumn weather still dominates our forecasts, but that doesn’t mean you have to resort to the indoor trainer or take the car or public transport for your utility trips. Riding in the autumn can be exhilarating, boost fitness ready for spring and summer rides, and improve your mental health and wellbeing by offering some much-needed exposure to daylight during the shorter days.
There’s no avoiding it though – autumn riding is more challenging than a spring morning commute or hitting up dusty summer trails. If you follow our top autumn cycling tips, however, you’ll be racking up the miles all the way through these darker months.
Preparation
Checking the weather
First thing to do is to check the weather. Forecasts are pretty accurate these days and provide detail on both wind strength and direction, precipitation and visibility levels, actual and true temperature, and sunrise/sunset times. These factors can play a big part in your ride and what you get out of it.
For example, tail winds are often better on your way back than on your way out, as you’re likely to be fresher at the start of your ride. If you can plan a loop that accommodates this it’ll help. Be especially aware of gusts, as they can be more harmful than a steady wind; stay away from exposed areas or busy roads if you can.
Even if your ride starts bright and clear, this can change dramatically as it goes on
Ross Adams, Cycling UK's training manager
Mudguards
Don’t forget to fit your mudguards. If you have a dedicated winter bike, you will undoubtedly already have them set up, but if yours is a one-bike stable then get them fitted; no one wants a face full of road spray or trail porridge, and a badger stripe up your back isn’t always a good look. Your riding buddies will also thank you for not spraying them with dirty water.
Visibility
Make sure your lights are charged; in the autumn and winter period, visibility can be limited even during daylight hours, and changeable weather can greatly affect it. Bear in mind that even if your ride starts bright and clear, this can change dramatically as it goes on.
Having a back up plan
If the weather does up its game, and either the fun ends or it becomes unsafe to be out, it’s important to factor in a way to bring your ride to an end sooner. Whether that’s knowing where your nearest train station is, or how to get off the mountain and return to a lower level quickly, escape routes are an essential part of any ride – even more so during poor weather.

Clothing
We all know one of the great things about the bike is that you can ride it in almost any clothing. You don’t need specialist apparel or some kind of armour for a quick trip to the shops or to visit friends or family. However, if you’re heading further afield, particularly during poor weather conditions, some consideration for clothing can make all the difference.
Think about layering
As ever, layering is the ideal method when outdoors. Technical clothing can help wick away moisture and keep you dry and odour-free, but any item will perform the task of trapping air between layers to keep you warm. Adding a waterproof outer layer will keep rain and surface water at bay. Of course, layering also means you can add and remove items as necessary, helping you regulate fluctuations in body temperature.
During cold spells the body will be working harder to generate heat. As you cycle, it is generated in the legs, and the body also has a natural tendency to concentrate its heat source into the core, as this focuses blood flow to the internal organs. It does, however, also mean the extremities are de-prioritised, leaving them more vulnerable to getting cold, which can be uncomfortable, and in extreme cases, even painful.
Take care of your hands and feet
Good gloves, thicker socks and a snood are essentials for any autumn riding wardrobe. They’ll keep those extremities warm and provide much-needed protection from the wind. If you can stretch to waterproof gloves, socks and even some overshoes, it’ll keep the rain and standing water at bay, too.
Heat packs can be useful and are affordable, but since many are single-use items, they’re not the most sustainable. However, placed under the instep or inside gloves (as long as they don’t impair grip) they can provide welcome relief which can last for a few hours. That makes them a good emergency heat source to keep in your riding pack or jersey pocket, so you can reach for them if the temperature or wind chill get too much.
Cover your eyes
Glasses are another great and affordable piece of kit. Cold air blown into your eyeballs can be unpleasant, but not as unpleasant as trail or road splash – the latter is not just unwanted but can also be dangerous. Mudguards will help with this, but those stray trail projectiles have an uncanny homing ability when it comes to seeking out your eyeballs and can bypass your guards, no matter how well they fit. Glasses are a way around this, and good for year-round use, but with all the wet debris around, they become even more essential in colder months.

Riding
Now that you’ve planned your route and got yourself dressed, it’s time to head out and get some miles in.
Tarmac
There are a few specific things to consider depending on what surface you’re riding on. On tarmac, wet leaves can present a highly slippery surface to all but the knobbliest of tyres. If you can cycle around them without creating a more dangerous situation, then leaves are best avoided. If you must ride through them, approach them in a straight line with minimal or no steering. Be mindful of what treasures may lie beneath – the joys of potholes, glass and dog toffees offer the unsuspecting rider a different type of adventure.
Dog poo combined with leaves can also be an issue when riding off-road. Annoyingly, they can be a lot harder to spot, although in general leaves are not an issue to the mountain biker.
Off-road
When riding off-road, you can face far more challenging obstacles than wet leaves. Mud and roots can catch even the most experienced rider off guard. The same technique applies as when tackling wet leaves on the road; hit the obstacle at 90 degrees and slightly unweight the front wheel – this will help your bike track over the roots or through the mud without washing out.
If you can’t avoid mud and puddles, cycling around them rather than straight through may seem like the right approach. However tempting that may be, in most cases it’s better to aim for the middle. Riding along the edge erodes the ground even more, increasing the size of the puddle and adding to the problem, whereas riding through doesn’t. Be careful of depth though – the hollow could be a lot deeper than you anticipate, and you might encounter hidden obstacles such as rocks or logs. If you can’t see the bottom, approach with caution and at a lower speed.
Changing tyre pressure
Regardless of the surface you’re on, reducing tyre pressure is a good idea. It helps with traction and grip when things get squirrelly, because it increases the size of the contact point between the tyre and the riding surface. It therefore limits the likelihood of the wheels washing out from beneath you. The amount of pressure you drop isn’t an exact science, however, and will depend on the surface, your tyres and your weight. As a rule of thumb, look to drop your pressure by 10-20%, but don’t sacrifice comfort or increase your chances of a snakebite puncture.
Post-ride
Coming back from an autumn ride, we’re often cold, wet and dirty, so the last thing we want to do is to start cleaning our bike and kit. The shower or bath and a hot drink are calling and that’s understandable, but make sure you follow that up with your cleaning regime. If you’ve been off-road and you’ve brought half the trail home with you, rinse the worst of it off before any clothes go in the washing machine. Your white goods will thank you for the prewash rinse.
If you’ve used waterproof kit, remember to reproof if according to the manufacturer’s instructions. There are many good and affordable reproofing products to choose from, and this will be highly cost-effective in the long run.
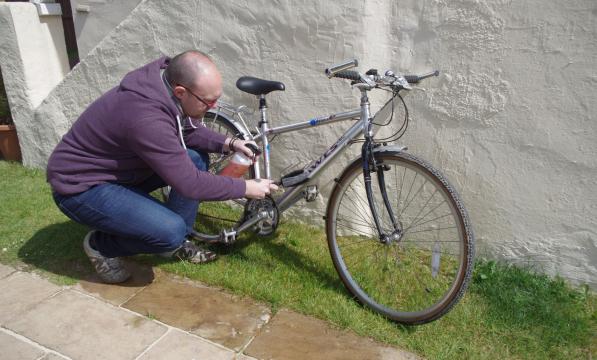
Once that kit is on its first cycle, it’s time to get your bike back to pristine condition. Nothing kills a bike’s drive chain faster than leaving it dirty and failing to maintain those vital moving parts. Rinse off with water first, and then ideally use a bike-specific detergent spray to loosen the debris. Leave for a few minutes to let it works its magic, then rinse off with clean water.
Bike cleaning brushes can help at this stage. Use soft brushes for frame and forks and slightly coarser ones for wheels and drive chain. A chain bath is an excellent piece of kit to really get those links clean; remember that a chain shouldn’t be black and covered in oil.
Once clean, apply specific lube to the chain and other moving parts and leave for a minute to work its way in. Then wipe the excess off with an old rag. Finally, tuck your bike back up wherever it lives and you’re ready to do it all again.


